
This project came to be when I put together a cinderblock/wood plank bench for our family cabin. The inspiration for the bench came from Kayla's Basement. I actually put the bench together last summer, but never got around to adding a cushion before the cabin was closed up for the winter. This summer, I decided I needed to get it done.

First off, you'll need to figure out what size you want your cushion to be. My bench was made using 8 ft planks. I measured the bench between the cinderblocks to determine my cushion length: 76 in. To figure the depth, I measured from the back of the back plank to the front of the front plank: 26 in.
Next, you'll need to gather your materials. Here is what you'll need (measurements provided are the measurements I used for my 76x26 in cushion):
- Foam for the cushion.
- Outdoor fabric (2.5 yards)
- Coordinating piping (5 yards)
- Coordinating zipper (the longer the better - I used 28 inch)
Just a side note about materials: Foam is really expensive to buy. If you want a quality cushion, I recommend buying good quality foam pad from JoAnn or somewhere similar. Since I was going for a budget-friendly version, I used an old eggshell pad that's been hanging out in the closet at the cabin for years. It just happened to be the perfect size when I folded it in half - eggshell sides together, which made it about 4 inches thick.

Now you're ready to begin!
Step 1: Cut your fabric to size & square up the edges.

First, I laid my fabric out on top of my foam to make sure I didn't need to trim my foam down at all.
Then, I trimmed off my selvedges so that I was working with a clean edge.

I determined that I needed my fabric to be 80 inches long so that I'd have 4 inches to compensate for the depth of the foam and seam allowances. I squared up the short edges and trimmed off a total of 10 inches from one end of the fabric.
I decided to use the fold in the fabric along the back of the cushion so that I would only be adding piping and sewing three sides.
Step 2: Baste your piping in place.
Since we're dealing with thicker fabric, you'll want to baste your piping in place on one side of your fabric. Start in the middle of your long edge and pin your piping in place on the right side of the fabric.

I left my normal presser foot on my machine, switched to a basting stitch, then stitched right along the raw edge. There should be just enough space to have the left edge of the presser foot up against the piping cord as you stitch the edges together. Your piping only needs to extend halfway down the short sides of your fabric. Find the halfway point, then leave an extra inch or two of piping past where you stop basting.

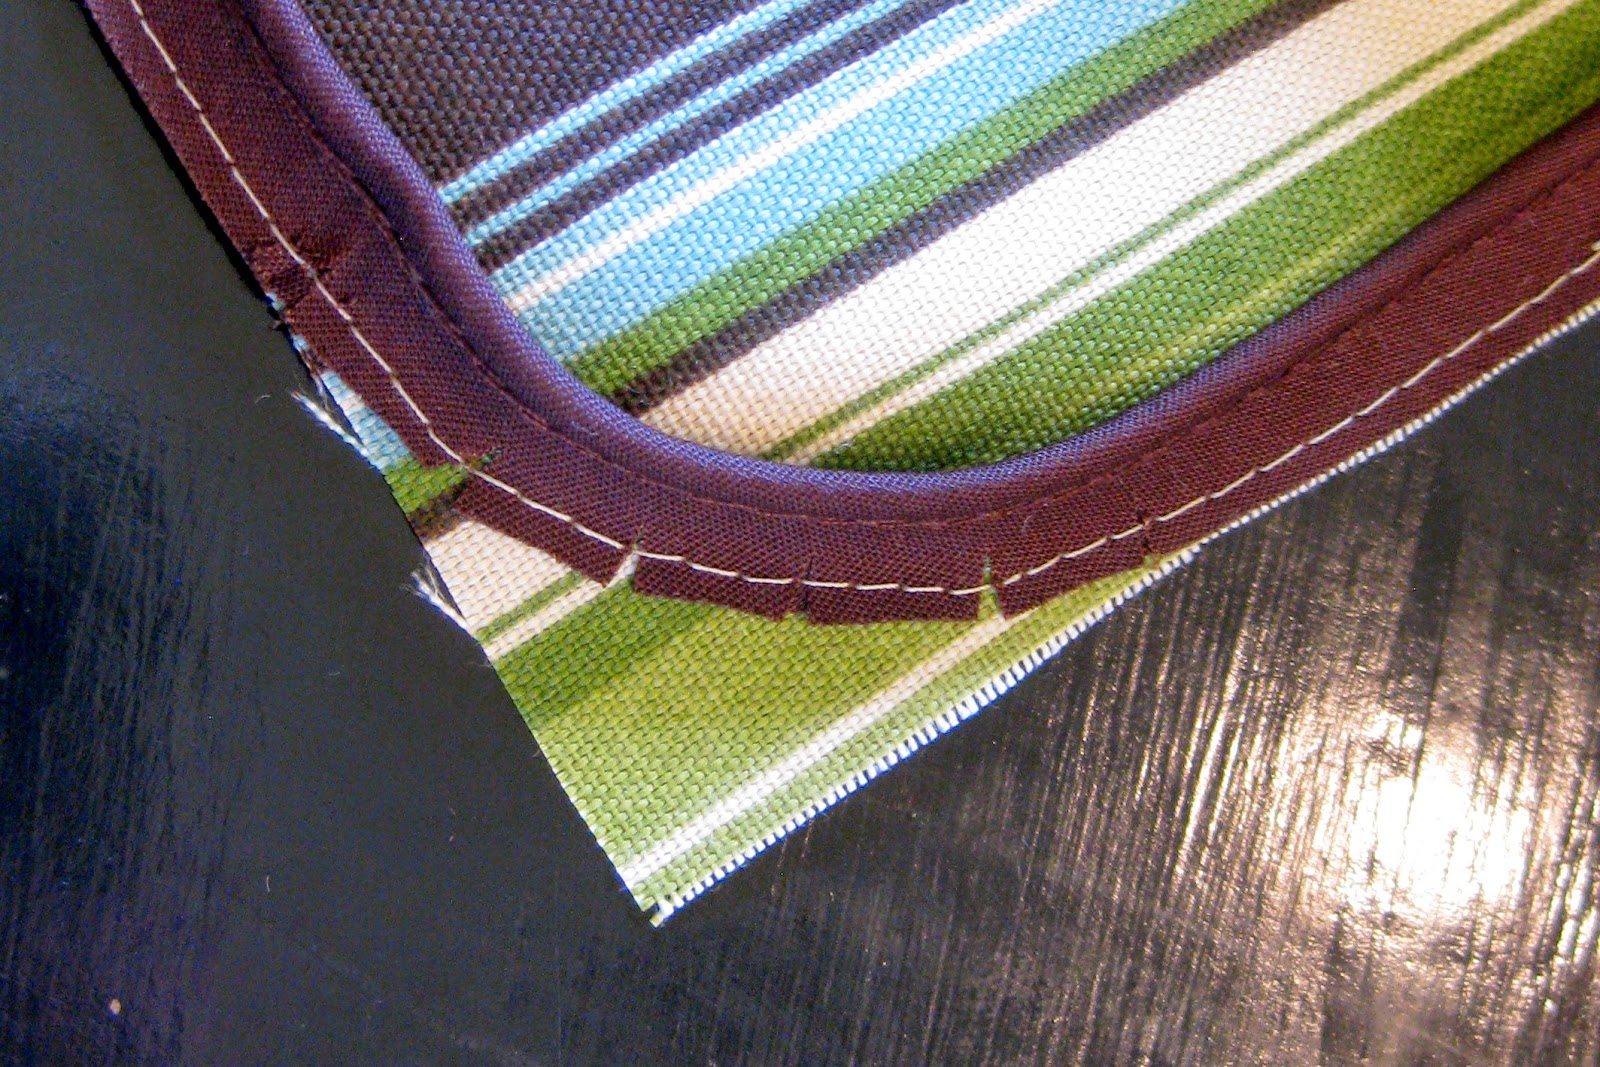
Since we're using piping, you won't have square corners. When you near a corner with your piping, clip the edge a few times until you can get it to lay flat around the corner. Baste it in place, then trim the fabric to match the piping edge.
Step 3: Stitch your layers together.

Switch to your zipper foot on your machine. Fold your fabric lengthwise. With right sides together (and piping sandwiched between), stitch all the layers together. I stitched my entire thing closed.
When you get to the folded corners, fold your piping under and tuck the end through, like in the photo. This way, the raw edge of the piping will end up on the inside of the cushion cover. Sew all the way to the corners.

Step 4: Install the zipper.
On the long folded edge of your fabric, you will cut a slit for the zipper. Make sure the slit is at least an inch shorter than your zipper. I wanted my zipper right in the middle of the cover to make it easier to get the foam into the cover. You could also add the zipper at one end of the cushion if you prefer.
Turn your cover right side out.
Follow the instructions that come with your zipper. Or, if you bought one like mine that didn't include instructions, follow these steps:
- Unzip your zipper.
- Pin one side of the zipper in place, folding the raw fabric edge under as you go. Be sure to fold it under enough that your stitches will catch it - approximately 1/4 inch.

- Using the zipper foot, stitch the entire length of one side of the zipper.
- Pin the other size of the zipper in place.
- Stitch the entire length of the zipper.
- When you come to the end without the zipper pull, make sure the zipper is on the inside of your cover, then stitch across the zipper if your machine can handle it. If not, do your best to taper your stitches until each side's stitching meets up below the zipper.
Once your zipper is installed, shove your foam into the cover, zip it up, and voila! You're finished!


Now our bench might need a little paint to jazz up those cinderblocks... but that's a project for another day!
Now our bench might need a little paint to jazz up those cinderblocks... but that's a project for another day!
No comments :
Post a Comment
Comments are swell!